Create a Backblaze B2 bucket
Before you can add buckets to Nebbl, you need to create them in the cloud storage provider services. Here are the detailed instructions for Backblaze B2 service.
Creating a Backblaze B2 bucket
Our task is to get 4 credential items for our bucket, which are:
- Region
- Bucket name
- Key ID
- Application key
Go to https://www.backblaze.com/sign-up/cloud-storage, click the Get Started for Free button and sign up for an account if you haven't already.
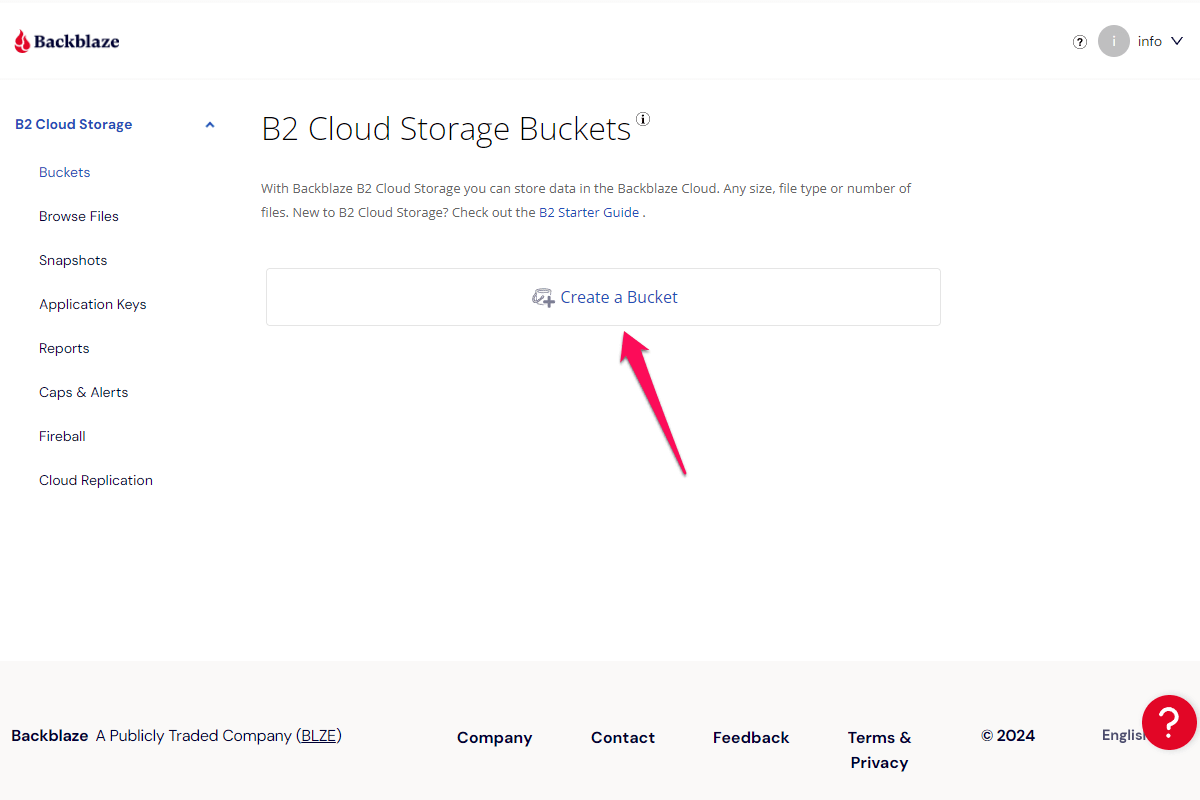
After registering and activating the account, head to the Buckets page and click the Create a Bucket button:
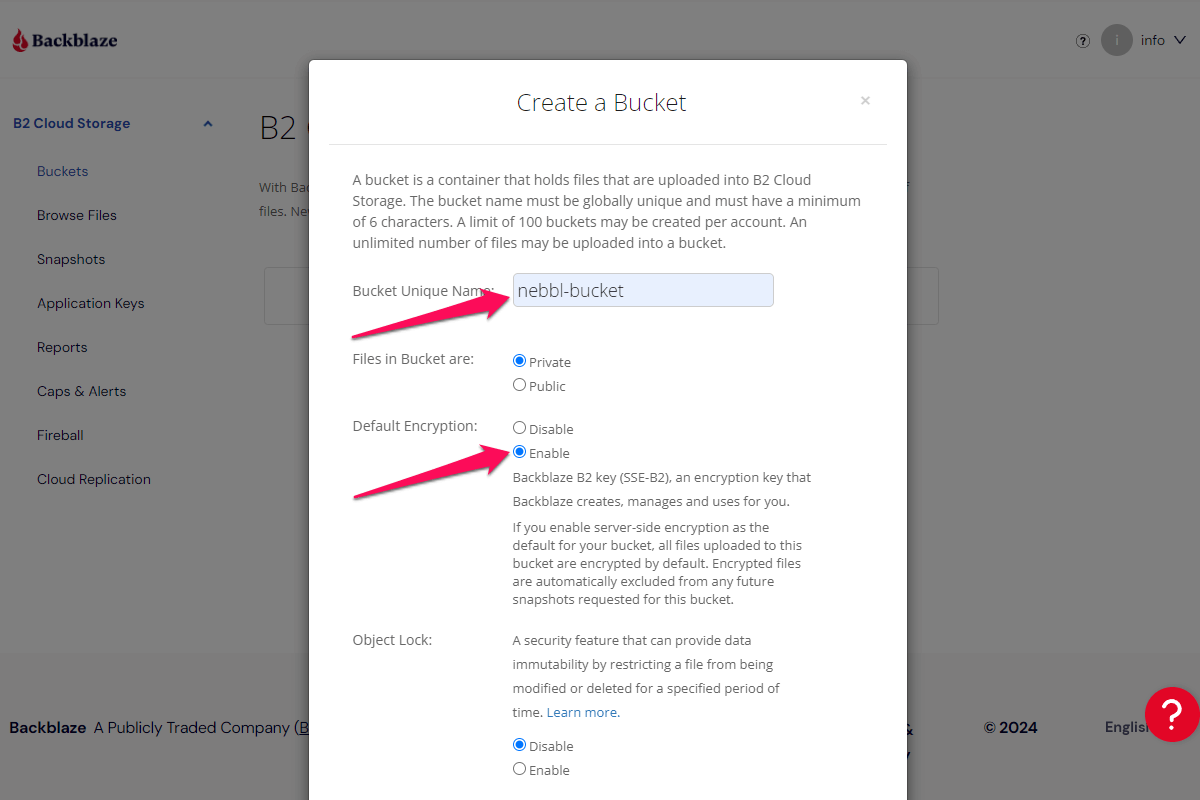
The Create a Bucket window will open. Enter your bucket name. For our purposes we choose nebbl-bucket as the name. This will be the first of our 4 credentials, note it down.
In the Default Encryption section select Enable. Leave the rest of the settings untouched and scroll down.
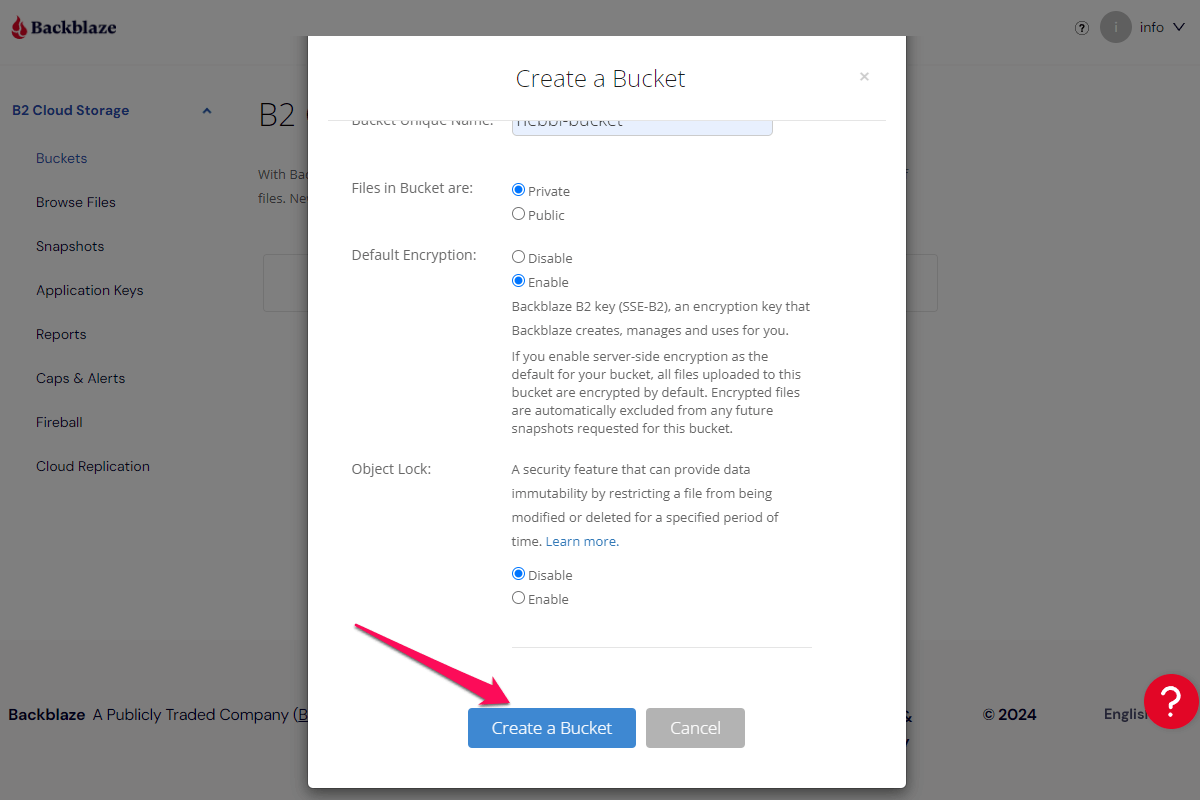
Click the Create a Bucket button:
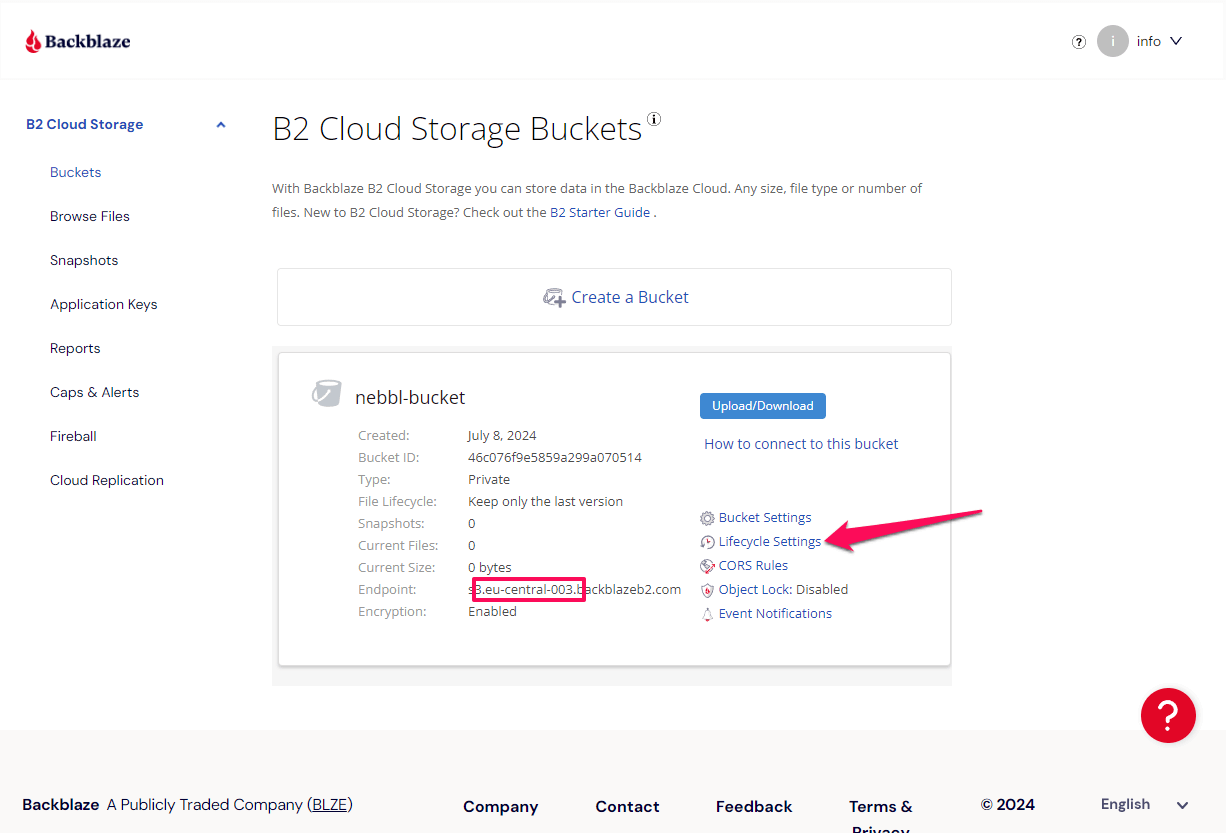
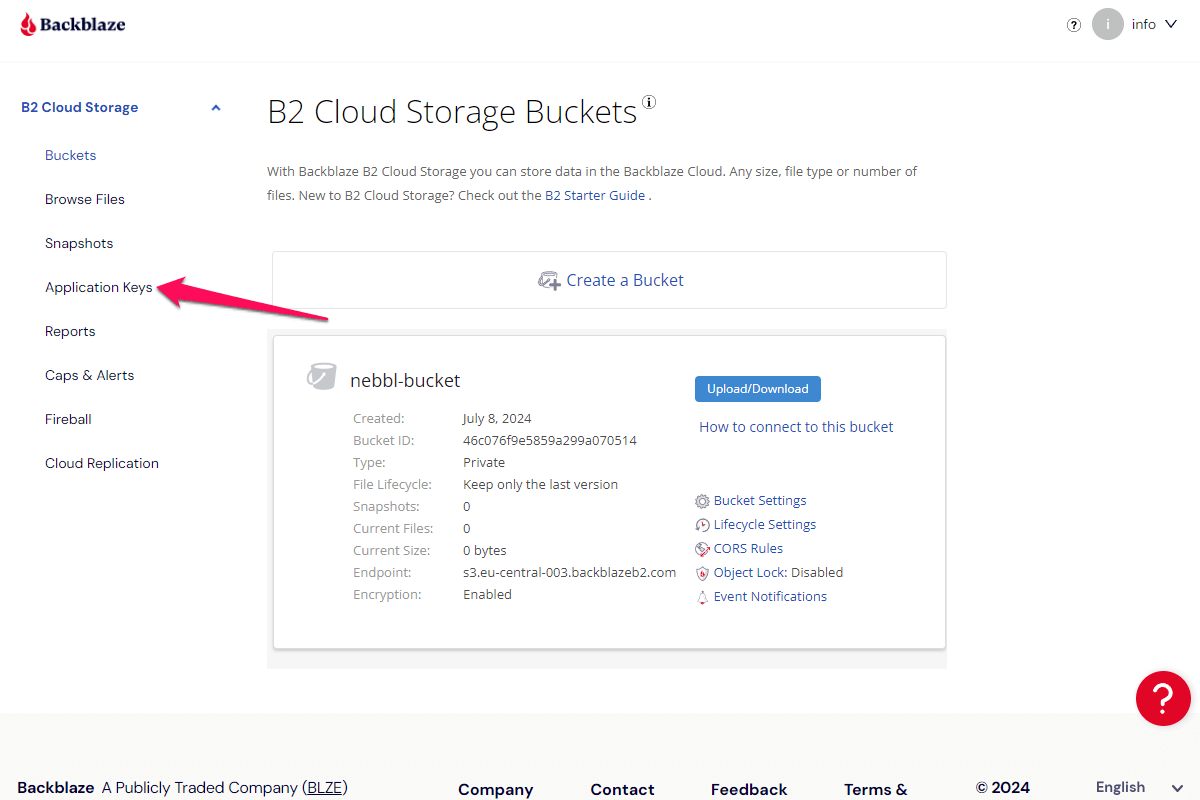
After the bucket is created you'll see it on the Buckets page. Note down the part of the address in the Endpoint field between the s3. and .backblaze.com parts (in our case it's eu-central-003). This is the second credential (Region) from our set.
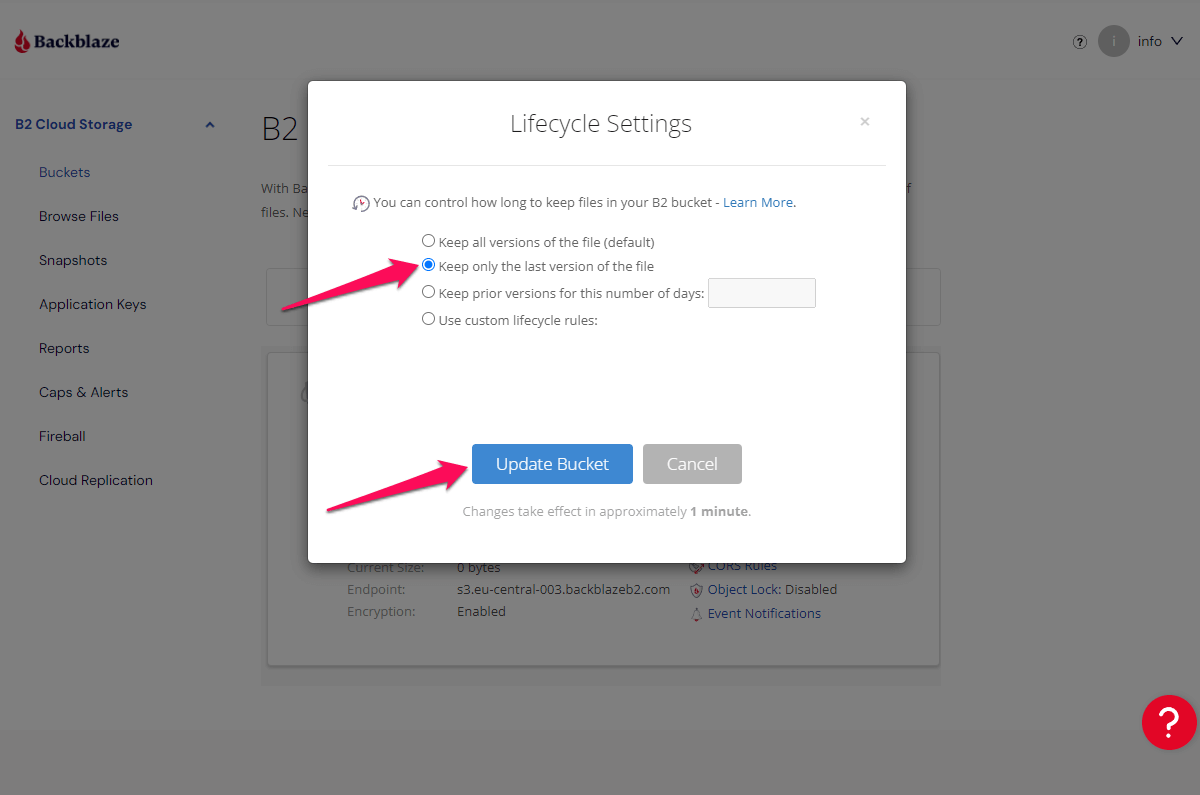
Then click the Lifecycle Settings link:
The Lifecycle Settings window will open. Select Keep only the last version of the file in it and click the Update Bucket button:
Next, go to the Application Keys page:
On the Application Keys page scroll down and click the Add a New Application Key button:

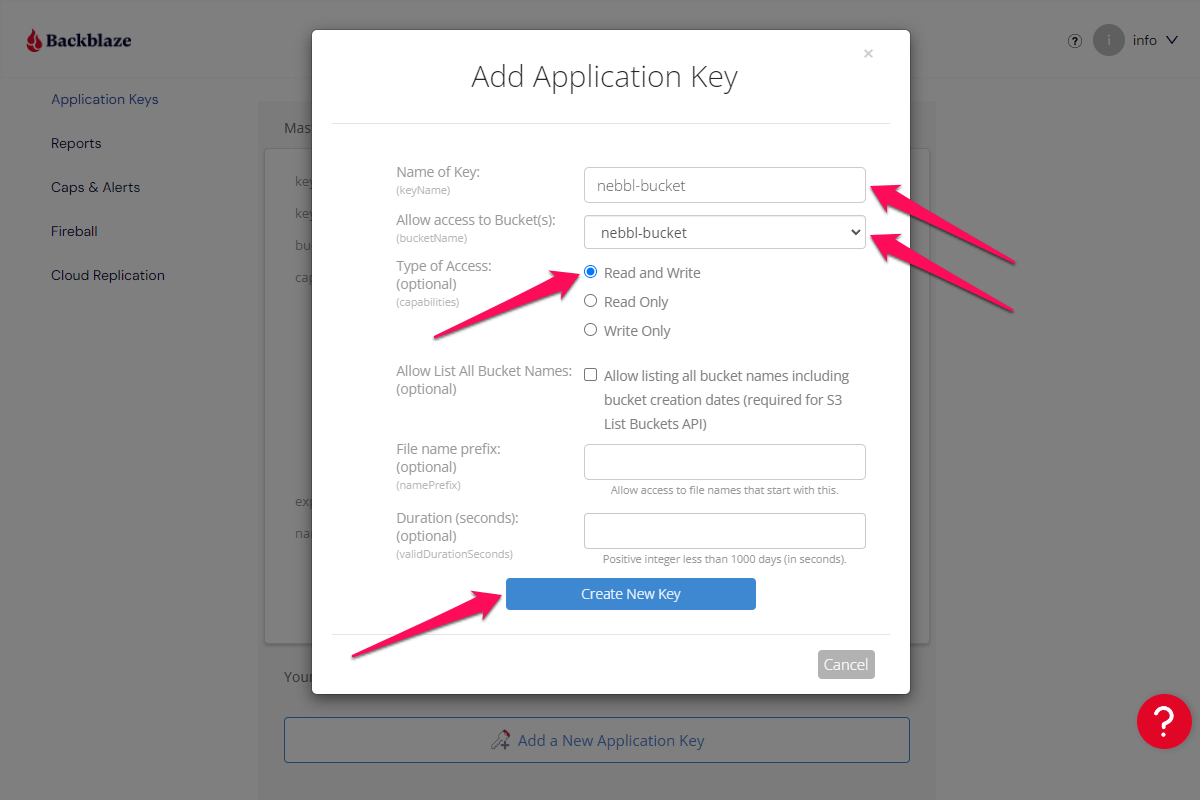
The Add Application Key window will open. Enter the name for the token. In our case we chose nebbl-bucket, the same as the bucket name.
In the Allow access to Bucket(s): section choose our nebbl-bucket from the list.
In the Type of Access section choose Read and Write.
Leave all the other options untouched and click the Create New Key button:
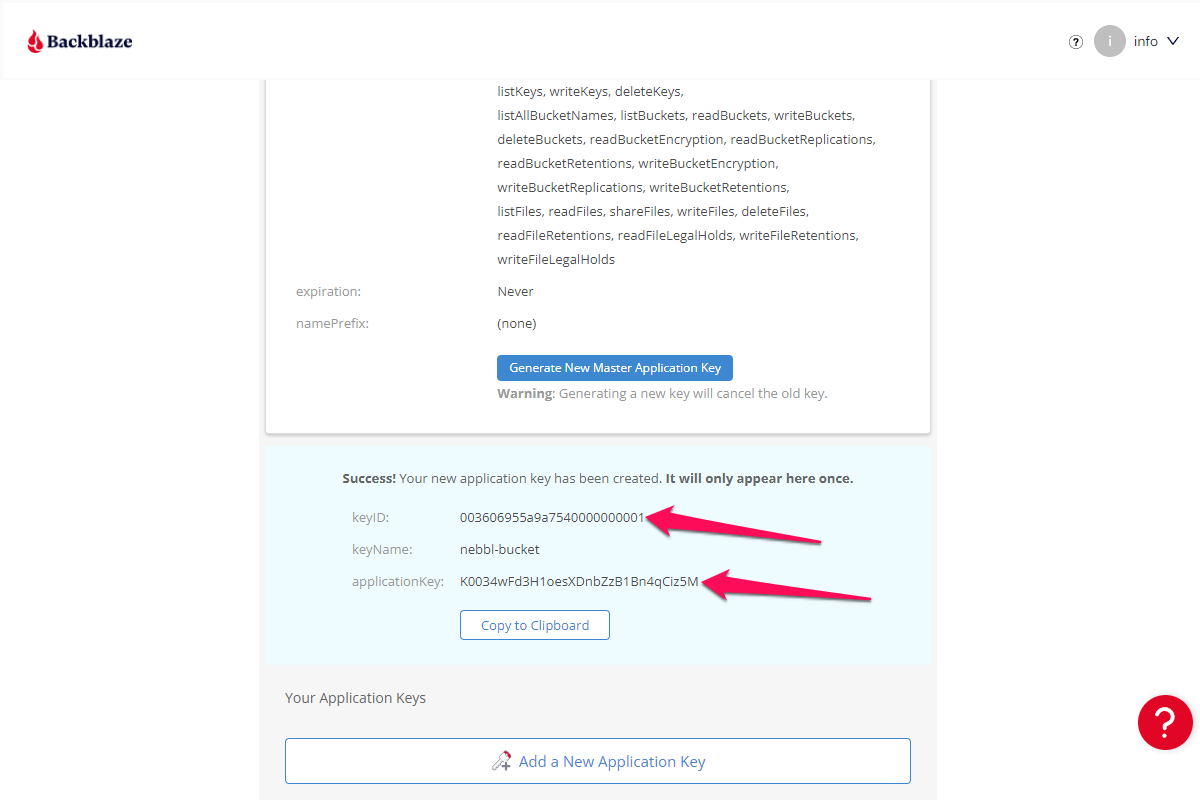
You will get back to the Application Keys page and it will show you the credentials of the newly created Application key in a light blue box.
The credentials in this box will be shown only once for security reasons, so be sure to copy them to a safe private place.
Note down the keyID and applicationKey values, these are the third and fourth credentials from our list:
Treat your Application key as a password. Don't share it anywhere outside of Nebbl or your cloud provider account.
Your Application key is securely encrypted within the Nebbl service and is never transmitted outside of it or even to the Nebbl user interface.
Next, scroll up and in the Master Application Key section click the Generate New Master Application Key button:
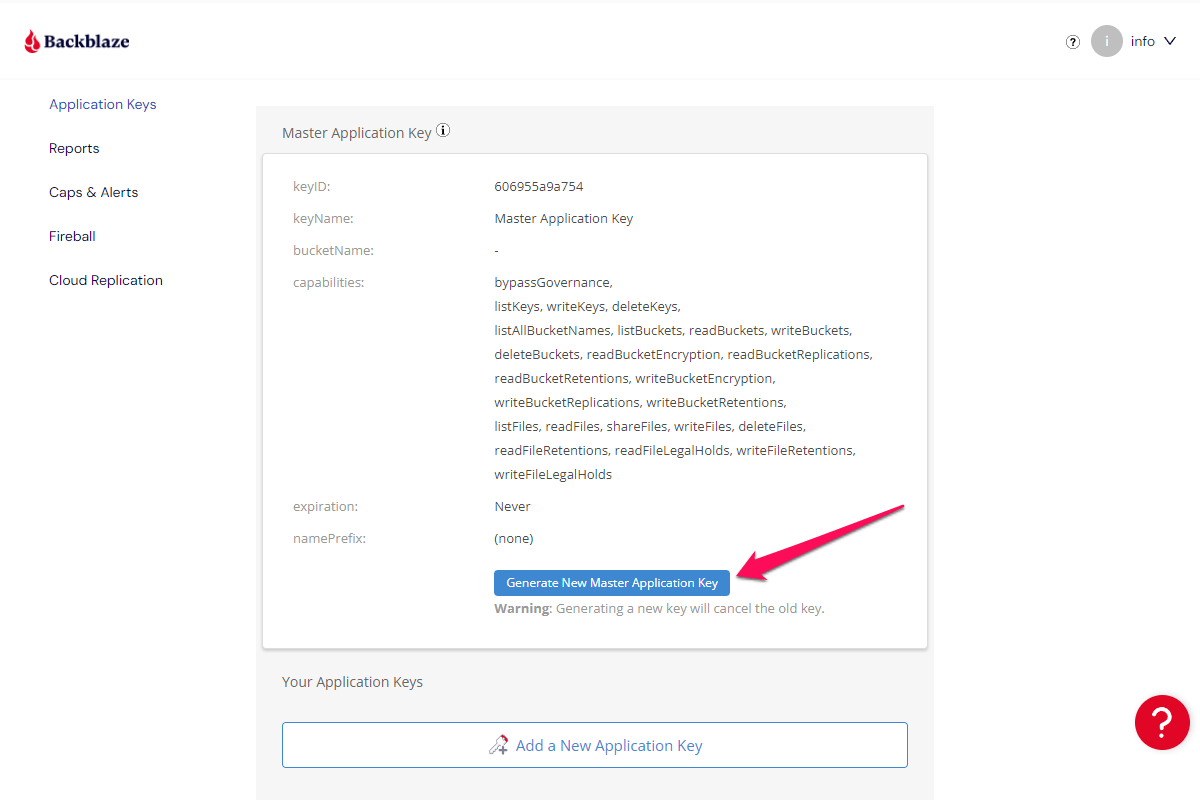
In the Are You Sure? dialog click the Yes! Generate Master Key button.
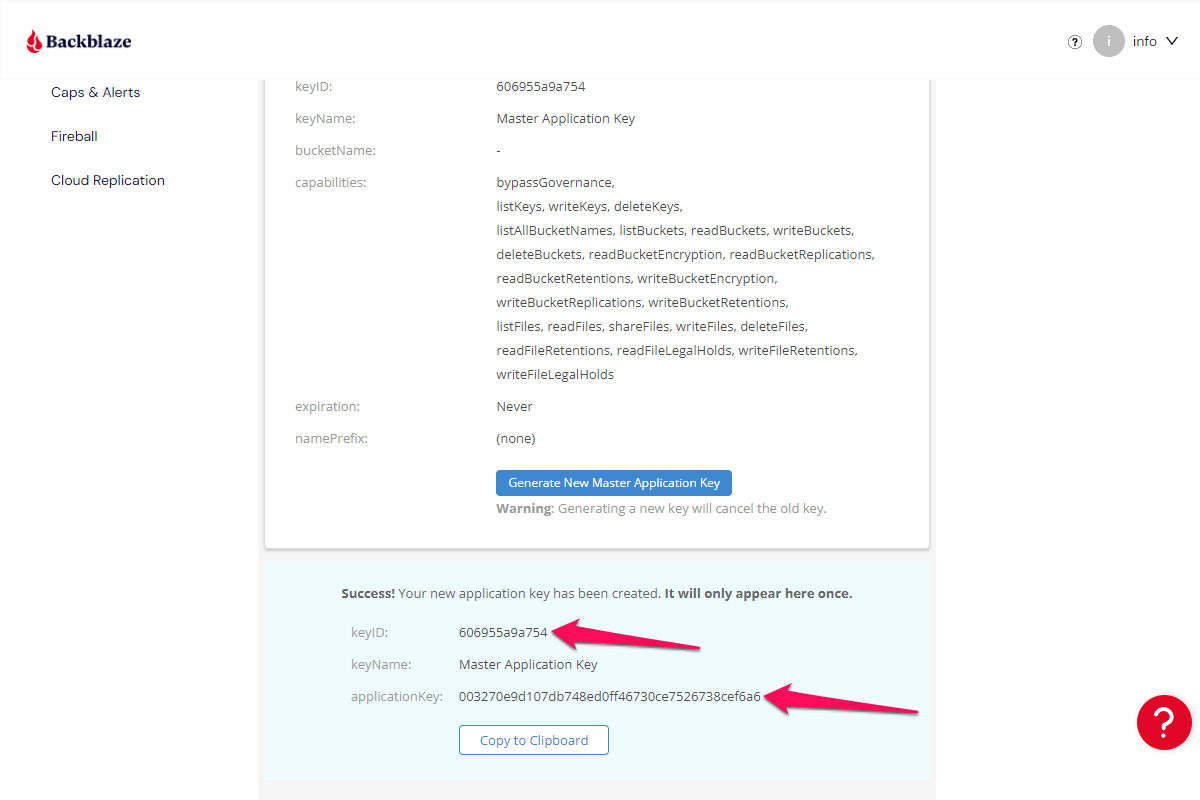
You will get back to the Application Keys page and it will show you the credentials of the newly created Master Application Key in a light blue box.
The credentials in this box will be shown only once for security reasons, so be sure to copy them to a safe private place.
Note down the keyID and applicationKey values, we will need them for the next step:
Treat your Master Application Key as a password. Don't share it anywhere outside of Nebbl or your cloud provider account.
Nebbl doesn't require your Master Application Key. It's needed to set up CORS rules for buckets only.
Updating CORS rules on Windows
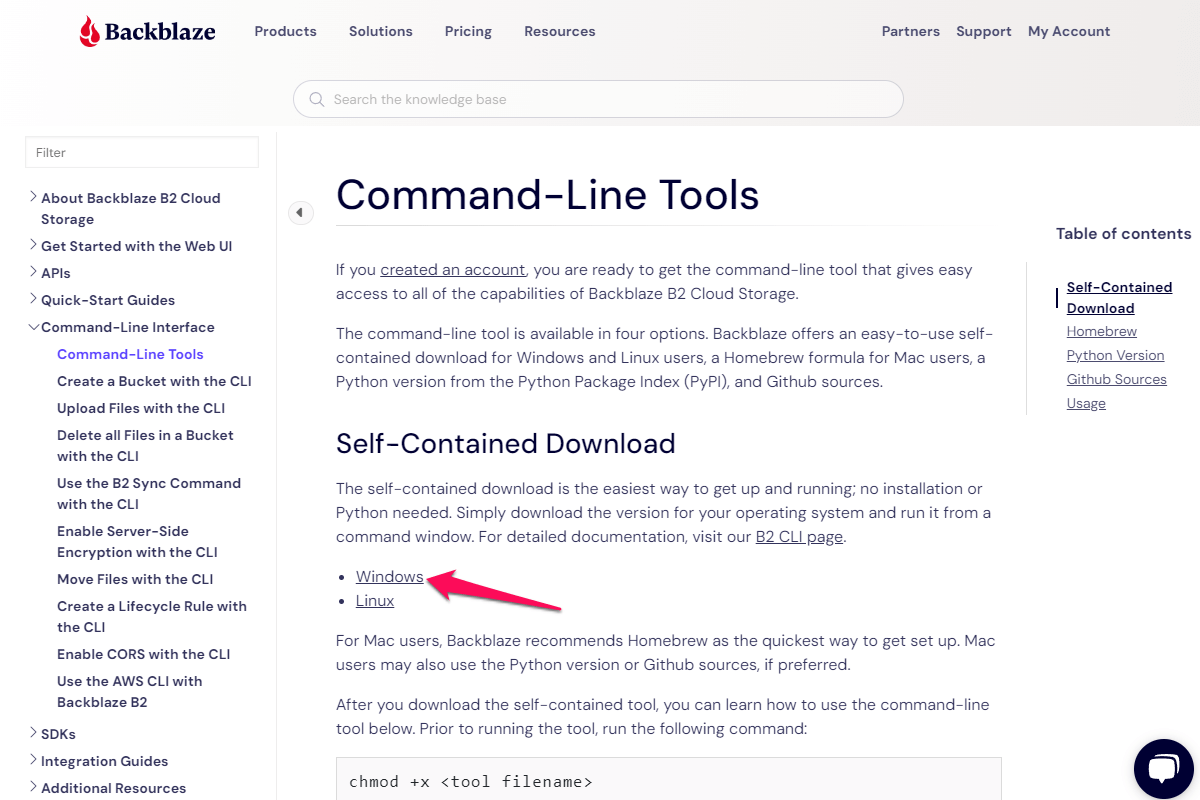
Next, go to the https://www.backblaze.com/docs/cloud-storage-command-line-tools and click on the Windows link to download the B2 CLI application:
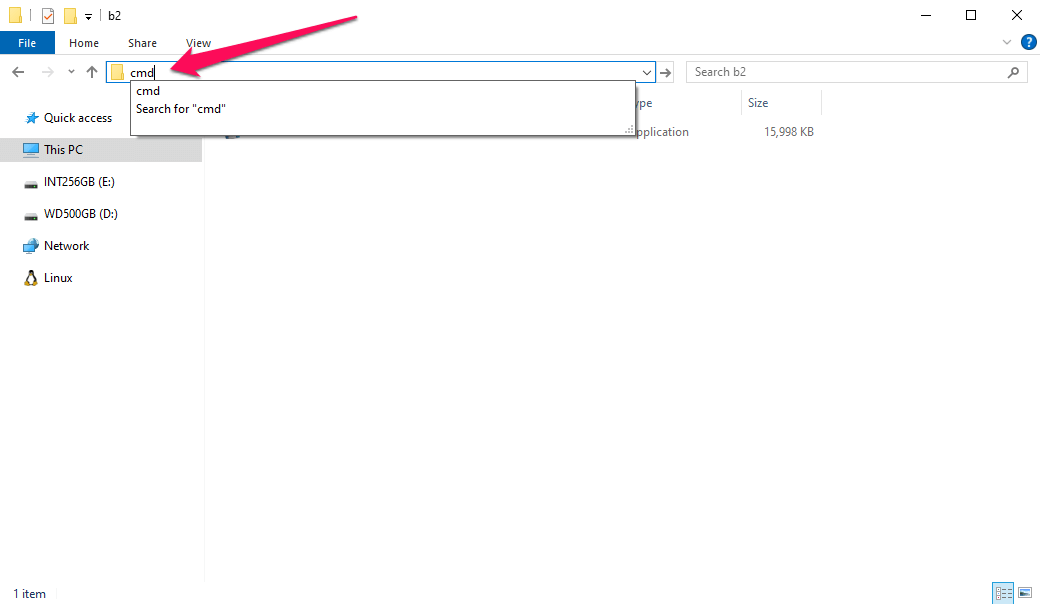
Save the application to a folder of your choice and go to that folder:
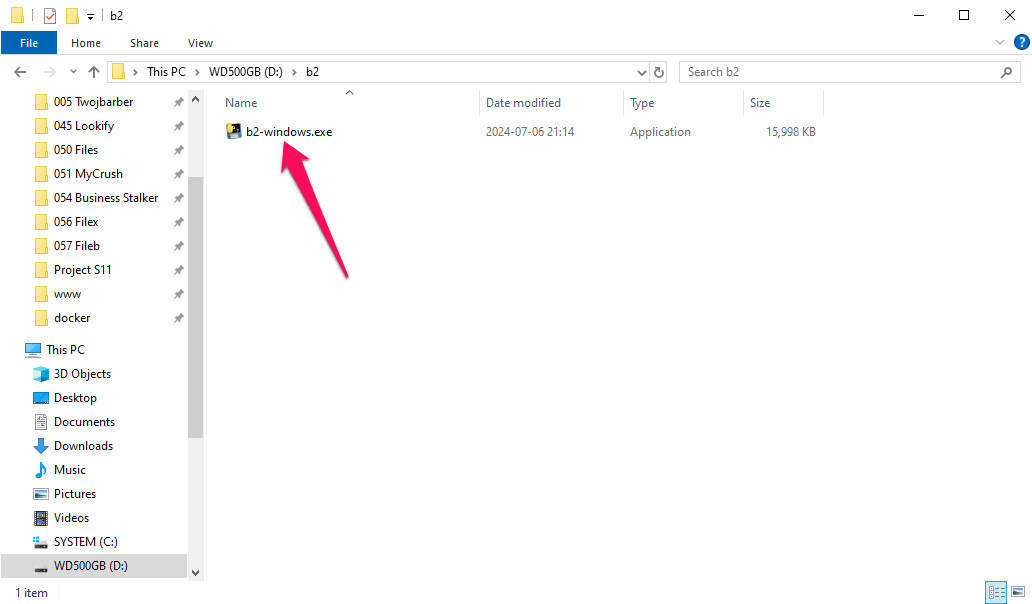
In the address bar of the same window type cmd and press the Enter key on your keyboard:
This will open a console window with the path set to the current folder. Enter the following command, where <master_key_id> and <master_application_key> are your Master Key ID and Master Application Key respectively:
b2-windows account authorize <master_key_id> <master_application_key>
So it would look like this:
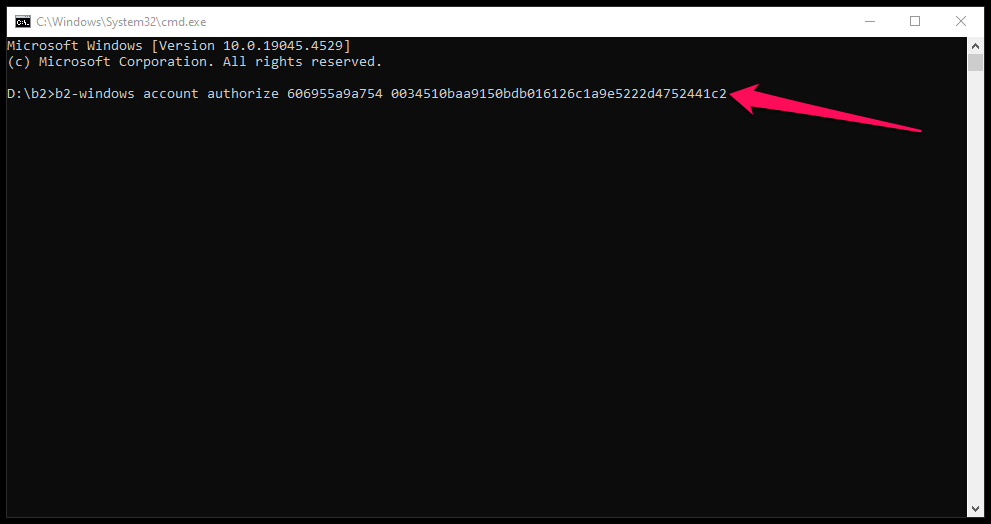
And press Enter on your keyboard.
Then copy and paste the following command (note nebbl-bucket in the end: if you named your bucket differently, change this accordingly):
b2-windows bucket update --cors-rules "[{\"corsRuleName\":\"AllowNebbl\",\"allowedOrigins\":[\"https://nebbl.com\"],\"allowedHeaders\":[\"Origin\", \"Content-Type\", \"Cache-Control\", \"Pragma\", \"Expires\", \"X-Requested-With\", \"X-Content-Type-Options\"],\"allowedOperations\":[\"b2_upload_file\", \"b2_download_file_by_id\", \"b2_download_file_by_name\", \"b2_upload_part\", \"s3_delete\", \"s3_get\", \"s3_head\", \"s3_post\", \"s3_put\"],\"exposeHeaders\":[\"x-bz-content-sha1\", \"ETag\"],\"maxAgeSeconds\":3600}]" nebbl-bucket
So it would look like this:
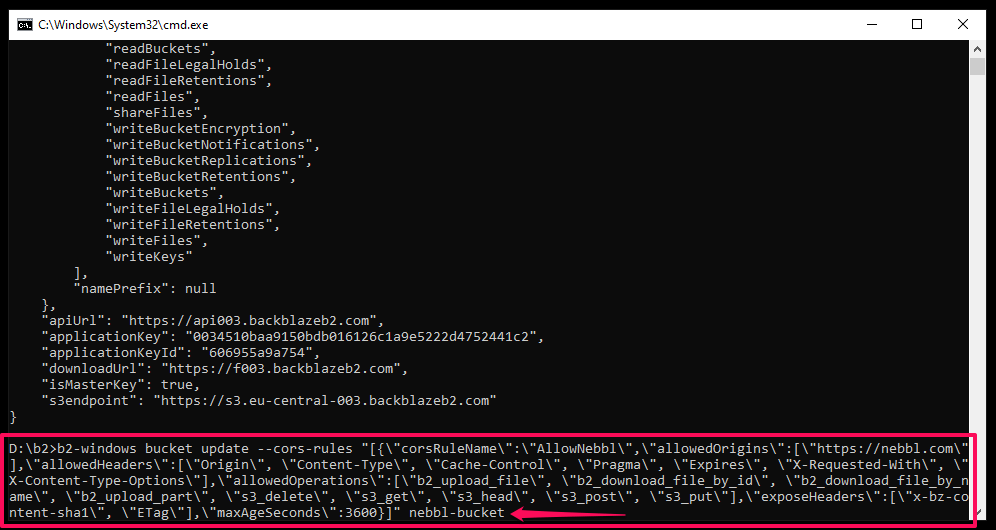
And press Enter on your keyboard. Wait for the response from the Backblaze server, when you see the response with the "revision" field in the end, this means the CORS rules were updated successfully.
That's all! Now we have everything set and all our four credentials too and we can add this bucket to Nebbl.